Generate an XML Sitemap with Node.js
Main Content
Author: James Edwards Published: 3/9/2021 Updated: 6/21/2021

Author: James Edwards Published: 3/9/2021 Updated: 6/21/2021
An xml sitemap informs search engines with information regarding the structure of a website and which pages should be available to be indexed in search results. The xml sitemap file includes the url location for all the pages included and the date the page was last modified. If you are building a blog website it is especially important to include a sitemap file containing information about all the blog posts. Recently more blogs are being built with the Jamstack, and since there is no server to dynamically serve the sitemap file, we can use Node.js to statically generate an xml sitemap file from blog post data. In this example we will use TypeScript along with the xml npm package to convert a JSON object containing blog post data into an xml string, and then write the generated xml string to a sitemap file. Before following these steps make sure to have Node.js and npm installed.
The first thing we need to do is to generate a package.json file so that we can install the xml npm package. If you don't already have a package.json file setup for your project run the command npm init in the project folder and follow the prompts. Once the package.json file is created run the command npm install xml typescript --save. This will install the xml npm package and the TypeScript npm package. Since we are using TypeScript for this example we also need to install the type definitions for the xml package. These can be installed by running the command npm install @types/xml --save-dev.
We are also going to use ECMAScript modules, or ES modules, instead of CommonJS modules, as Node.js now supports ES Module format. In order to use ES Modules the "type" property with value of "module" also needs to be added to the package.json file. Please read my other post for more information regarding how to import and export ES Modules in Node.js With these settings in place the package.json file should look similar to this:
{
  "type": "module",
  "name": "xmlsitemap",
  "version": "1.0.0",
  "description": "",
  "main": "index.js",
  "scripts": {
    "test": "echo \"Error: no test specified\" && exit 1"
  },
  "author": "",
  "license": "ISC",
  "dependencies": {
    "typescript": "^4.2.3",
    "xml": "^1.0.1"
  },
  "devDependencies": {
    "@types/xml": "^1.0.5"
  }
}
After adding the package.json file we can include the configuration steps that are needed to use TypeScript with ES Modules. To do this we can add a "tsconfig.json" file with the following settings:
{
  "compilerOptions": {
    "allowSyntheticDefaultImports": true,
    "isolatedModules": true,
    "strict": true,
    "module": "esnext",
    "lib": ["ES2019"],
    "moduleResolution": "node",
    "skipLibCheck": true
  },
  "include": ["index.ts"],
  "exclude": ["node_modules/**/*"]
}
The "module" setting with value "esnext" is the setting that configures the TypeScript compiler to compile TypeScript into JavaScript using the ES Module format.
Now we can create the Node.js script that will generate the XML string that will be written to the sitemap file. To do this add a new file to the project named "index.ts". And add the following code:
import xml from "xml";
import { writeFile } from "fs";

async function main() {
  const pages = [
    {
      title: "Sample Page One",
      created: "Dec 22 2020",
      slug: "sample-page-one",
    },
    {
      title: "Sample Page Two",
      created: "Feb 1 2021",
      lastModified: "Feb 2 2021",
      slug: "sample-page-two",
    },
    {
      title: "Sample Page Three",
      created: "Mar 2 2021",
      lastModified: "Mar 5 2021",
      slug: "sample-page-three",
    },
    {
      title: "Sample Page Four",
      created: "Mar 20 2021",
      slug: "sample-page-four",
    },
  ];

  const indexItem = {
    //todo: build index item
  };

  const sitemapItems = pages.reduce(async function (
    items: { url: [{ loc: string }, { lastmod: string }] }[],
    item: {
      title: string;
      lastModified?: string;
      created: string;
      slug: string;
    }
  ) {
    // todo: build page items
    return items;
  }, []);
}

main();
This code is now set up to use sample data that is stored in the "pages" array. In this example we are including data to represent pages that would be included as part of a static site generator build process. Typically with a Jamstack blog this data would be sourced from markdown files, or another common option is requesting data from a headless content management system. For the purposes of this example we are including a short page list directly in the code, but usually this would be dynamically included at build time. After the sample page data there is one object that will contain the data for the sitemap index item, and the other is an array of objects containing the sitemap data for each individual page.
The first item in the sitemap will include optional tags that won't be included in the individual page sitemap items, and that is why it is created separately. Besides including the url location and a last modified time, the index sitemap item includes the change frequency parameter and a priority parameter. These are optional and can be included for each sitemap item, but in this case we are only including it for the root url of the sitemap. Go ahead an add the following inside of the "indexItem" object shown above:
const indexItem = {
  //build index item
  url: [
    {
      loc: "YOUR-DOMAIN-HERE",
    },
    {
      lastmod: new Date(
        Math.max.apply(
          null,
          pages.map((page) => {
            return new Date(
              page.lastModified ?? page.created
            ) as unknown as number;
          })
        )
      )
        .toISOString()
        .split("T")[0],
    },
    { changefreq: "daily" },
    { priority: "1.0" },
  ],
};
Make sure to replace "YOUR-DOMAIN-HERE" with your actual domain. Also note that in order to find the most recent date of all of the pages, the Math.max() function is used, in combination with the function prototype method .apply(), which passes the array of page object dates as parameters to the Math.max function. The first parameter of the .apply method is this, which is not needed so it is set to null.
Additionally since we are using TypeScript the date objects cannot be cast directly from a JavaScript Date object into a number, so they are cast to the unknown type as an intermediary step to prevent the TypeScript compiler from showing type errors. Once the maximum date of all the pages last modified or created dates is determined, it is formatted as an ISO string date format and then trimmed to only include the year, month, and day.
With the index sitemap item created, we can now build the individual page items in the "sitemapItems" array. This process will be similar to creating the index item, but each page item will only include a url location property and a last modified timestamp. To build the sitemap items add the following code to the sitemapItems array creation step:
const sitemapItems = pages.reduce(function (
  items: { url: [{ loc: string }, { lastmod: string }] }[],
  item: {
    title: string;
    lastModified?: string;
    created: string;
    slug: string;
  }
) {
  // build page items
  items.push({
    url: [
      {
        loc: `YOUR-DOMAIN-HERE/${item.slug}`,
      },
      {
        lastmod: new Date(item.lastModified ?? item.created)
          .toISOString()
          .split("T")[0],
      },
    ],
  });
  return items;
}, []);
For each page items url location property make sure to replace the placeholder text with your actual domain.
Now that both the sitemap index item and the sitemap items for each page are created we can combine them into one object that will be the entire sitemap object. At the end of the main function add in this code:
const sitemapObject = {
  urlset: [
    {
      _attr: {
        xmlns: "http://www.sitemaps.org/schemas/sitemap/0.9",
      },
    },
    indexItem,
    ...sitemapItems,
  ],
};

const sitemap = `<?xml version="1.0" encoding="UTF-8"?>${xml(sitemapObject)}`;

console.log(sitemap);
At this point we can test to make sure that the JSON to xml string conversion is working properly by logging the xml string to the console. To do this we need to add a script command to the package.json file created earlier.
In order to test the xml sitemap creation process we can add a script to the package.json file named "generate-sitemap". This script will invoke the TypeScript compiler and then run the transpiled JavaScript with Node.js. Here is what the script should look like in the package.json file:
{
  "scripts": {
    "generate-sitemap": "tsc && node index.js"
  }
}
We can run this script with the command npm run generate-sitemap. After running the generate sitemap command, the xml sitemap string should be output to the console. Here is what it will look like:
<?xml version="1.0" encoding="UTF-8"?><urlset xmlns="http://www.sitemaps.org/schemas/sitemap/0.9"><url><loc>YOUR-DOMAIN-HERE</loc><lastmod>2021-03-20</lastmod><changefreq>daily</changefreq><priority>1.0</priority></url><url><loc>YOUR-DOMAIN-HERE/sample-page-one</loc><lastmod>2020-12-22</lastmod></url><url><loc>YOUR-DOMAIN-HERE/sample-page-two</loc><lastmod>2021-02-02</lastmod></url><url><loc>YOUR-DOMAIN-HERE/sample-page-three</loc><lastmod>2021-03-05</lastmod></url><url><loc>YOUR-DOMAIN-HERE/sample-page-four</loc><lastmod>2021-03-20</lastmod></url></urlset>
Instead of outputting the sitemap as an xml string we can write it to a file using the Node.js write file method in the fs module.
You can replace the "console.log" statement at the bottom of the index.ts main function with the following code to write the sitemap xml string to a file named "sitemap.xml":
await writeFileAsync("./sitemap.xml", sitemap, "utf8");
You will also need to add one import statements at the top of the index.ts file. This will import the promisify function from the util module. This way we can convert the writeFile module to use promises instead of callbacks, which enables the use of async await syntax.
import { promisify } from "util";
const writeFileAsync = promisify(writeFile);
Here is what the entire index.ts file should look like with all the code included:
import xml from "xml";
import { writeFile } from "fs";
import { promisify } from "util";
const writeFileAsync = promisify(writeFile);

async function main() {
  const pages = [
    {
      title: "Sample Page One",
      created: "Dec 22 2020",
      slug: "sample-page-one",
    },
    {
      title: "Sample Page Two",
      created: "Feb 1 2021",
      lastModified: "Feb 2 2021",
      slug: "sample-page-two",
    },
    {
      title: "Sample Page Three",
      created: "Mar 2 2021",
      lastModified: "Mar 5 2021",
      slug: "sample-page-three",
    },
    {
      title: "Sample Page Four",
      created: "Mar 20 2021",
      slug: "sample-page-four",
    },
  ];

  const indexItem = {
    //build index item
    url: [
      {
        loc: "YOUR-DOMAIN-HERE",
      },
      {
        lastmod: new Date(
          Math.max.apply(
            null,
            pages.map((page) => {
              return new Date(
                page.lastModified ?? page.created
              ) as unknown as number;
            })
          )
        )
          .toISOString()
          .split("T")[0],
      },
      { changefreq: "daily" },
      { priority: "1.0" },
    ],
  };

  const sitemapItems = pages.reduce(function (
    items: { url: [{ loc: string }, { lastmod: string }] }[],
    item: {
      title: string;
      lastModified?: string;
      created: string;
      slug: string;
    }
  ) {
    // build page items
    items.push({
      url: [
        {
          loc: `YOUR-DOMAIN-HERE/${item.slug}`,
        },
        {
          lastmod: new Date(item.lastModified ?? item.created)
            .toISOString()
            .split("T")[0],
        },
      ],
    });
    return items;
  }, []);

  const sitemapObject = {
    urlset: [
      {
        _attr: {
          xmlns: "http://www.sitemaps.org/schemas/sitemap/0.9",
        },
      },
      indexItem,
      ...sitemapItems,
    ],
  };

  const sitemap = `<?xml version="1.0" encoding="UTF-8"?>${xml(sitemapObject)}`;

  await writeFileAsync("./sitemap.xml", sitemap, "utf8");
}

main();
You can then run the npm run generate-sitemap command again, and a new file named "sitemap.xml" should be created in the project folder. The contents of this file should be identical to the sitemap xml string that was logged to the console in the previous step.
To test out the sitemap in a browser, in the same project folder that we created the index.ts file run the command npm install http-server --save-dev, and add another script to the package.json file like this:
{
  "scripts": {
    "generate-sitemap": "tsc && node index.js",
    "serve": "http-server"
  }
}
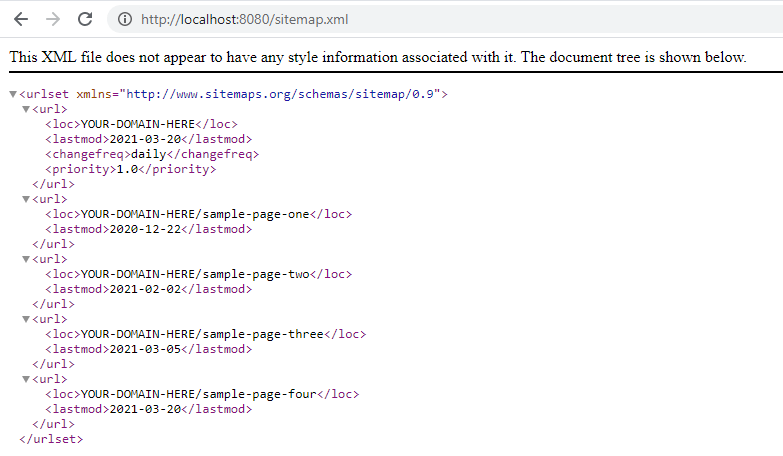
Then to use the http-server npm package run the command npm run serve, and you should see the http-server npm package output the url it is serving. It is most likely the default setting so navigating to "localhost:8080/sitemap.xml" should show the sitemap file that will look similar to this:
Now you can include the sitemap generation step in the build process of the static site generator that you might be using for your Jamstack blog. You can also add a line to the robots.txt file to indicate the url of the sitemap file. If you are using a robots.txt file for your site make sure to add the following with your domain included:
Sitemap: https://YOUR-DOMAIN-HERE/sitemap.xml