Secure a Github Webhook with Node.js
Main Content
Author: James Edwards Published: 2/23/2021 Updated: 6/21/2021
Author: James Edwards Published: 2/23/2021 Updated: 6/21/2021
GitHub provides webhooks that can send a POST request when a predetermined event is triggered. There are many different GitHub event types, and a common event to integrate into workflows is the PullRequestEvent. Any time a pull request has event activity of the following action types:
a POST request can automatically be sent to trigger an integration that is waiting to accept the incoming request. In this example we can set up an Azure Serverless Function using Node.js to accept a GitHub Webhook POST payload. The serverless function will only run when the pull request is from the main branch, the branch associated with the pull request is merged, and the pull request is closed. If all of the following conditions are true, we will also make sure to secure the GitHub webhook by using the @octokit/webhooks npm package to verify the "x-hub-signature-256" request header using an application secret. When the incoming POST request payload is verified to be originating from GitHub's servers any application logic relating to the pull request closing, in the serverless function, can run as expected.
The first thing we'll need to do is set up an Azure Serverless function so that there is an HTTP endpoint available to accept the incoming webhook POST request that will be sent from GitHub any time an event associated with a pull request occurs. It is not required to use Azure Serverless Functions with GitHub webhooks, so you can exchange this with another technology like a Node.js server using express. All that is required is an HTTP endpoint, using Node.js, that can accept incoming post requests.
Microsoft provides documentation for a quick start to create a function in Azure with TypeScript and Visual Studio code. This steps in this guide will build off that documentation so it is required to set that up before proceeding.
Once you have the HTTP trigger function setup and you are able to run it locally as indicated in the quick start, we can add the @octokit/webhooks into the package.json that was automatically generated in the functions project. To do this use Visual Studio Code to open a terminal window in the folder where the package.json file was generated for the functions project. Then run the command npm install @octokit/webhooks --save. This will add the @octokit/webhooks npm package into the node_modules folder for the project, so that it can be imported into function code.
In the HTTP Trigger function that was created by following quick start guide, this will be called "HTTPExample" if you did not change it, we need to add code to utilize the @octokit/webhooks package that was just installed. You can delete the sample code provided for "HTTPExample" function file named "index.ts". Then go ahead and add the following code into the index.ts file:
import { AzureFunction, Context, HttpRequest } from "@azure/functions";
import { Webhooks } from "@octokit/webhooks";

const httpTrigger: AzureFunction = async function (
  context: Context,
  req: HttpRequest
): Promise<void> {
  context.log("HTTP trigger function processed a request.");

  context.res!.headers["Content-Type"] = "application/json";

  const payload = req.body;

  context.res!.status = 200;
  context.res!.body = { message: "success" };
};

export default httpTrigger;
This is the starting code needed to utilize the @octokit/webhooks npm package verify method. The code to do the verification hasn't been added, only the import statement that is on the second line of code. To use the verification method update the index.ts file to look like this:
import { AzureFunction, Context, HttpRequest } from "@azure/functions";
import { Webhooks } from "@octokit/webhooks";

const httpTrigger: AzureFunction = async function (
  context: Context,
  req: HttpRequest
): Promise<void> {
  context.log("HTTP trigger function processed a request.");

  context.res!.headers["Content-Type"] = "application/json";

  // application/json post request body
  const payload = req.body;

  if (
    payload.action != "closed" ||
    payload.pull_request.base.ref != "main" ||
    !payload.pull_request.merged_at ||
    !new Webhooks({
      secret: process.env["GitHubWebhookSecret"],
    }).verify(payload, req.headers["x-hub-signature-256"])
  ) {
    // this pull request is either:
    //  not closed,
    //  not referencing the main branch,
    //  not merged,
    //  or is not valid
    // so by returning we are not going to process the application logic below
    return;
  }

  // your application logic goes here

  context.res!.status = 200;
  context.res!.body = { message: "success" };
};

export default httpTrigger;
Note: The "GitHubWebhookSecret" is not directly included in the code. Since this is a secret value it is more secure to access this as an environment variable. To add an environment variable within an Azure Functions project, you can view the documentation for how to add an application setting with the Azure portal. This value should be secret and not shared with anyone. In the upcoming steps we will add this to the GitHub repository webhook settings so that the @octokit/webhooks npm package can use this value to verify the request payload. If you are running your function locally you will also need to add the same "GitHubWebhookSecret" setting to the "local.settings.json" file that was automatically generated in the function project folder. Your local.settings.json file can include this value like this:
{
  "IsEncrypted": false,
  "Values": {
    "AzureWebJobsStorage": "",
    "FUNCTIONS_WORKER_RUNTIME": "node",
    "GitHubWebhookSecret": "<YOUR-SECRET-VALUE>"
  },
  "Host": {
    "LocalHttpPort": 7071,
    "CORS": "*",
    "CORSCredentials": false
  }
}
With this code in place to secure the webhook, we can now be sure that any incoming requests are coming from GitHub's servers and meet the conditional criteria before processing further. Since the POST request from GitHub is sent when any event relating to a pull request occurs, the code above makes sure to only act on the incoming request if the pull request payload data indicates that the pull request is merged, closed, and from the main branch. This way if a pull request is opened or not associated to the main branch the webhook can ignore that request.
Now that we can accept incoming POST requests with webhook payloads from GitHub we need to configure the repository settings to send the request when the pull request event occurs. To do this a GitHub repository will need to be created, if not existing already, and once created navigate to the "Settings" tab. Then in the secondary navigation for the repository settings there will be a nav item labelled "Webhooks". This is where we can configure the url for the webhook and the secret value that is used to verify the incoming request shown in the code above. You can click the button labelled "Add webhook" and GitHub will prompt you to enter your password to continue. Once you have entered your password you will see a screen like this:
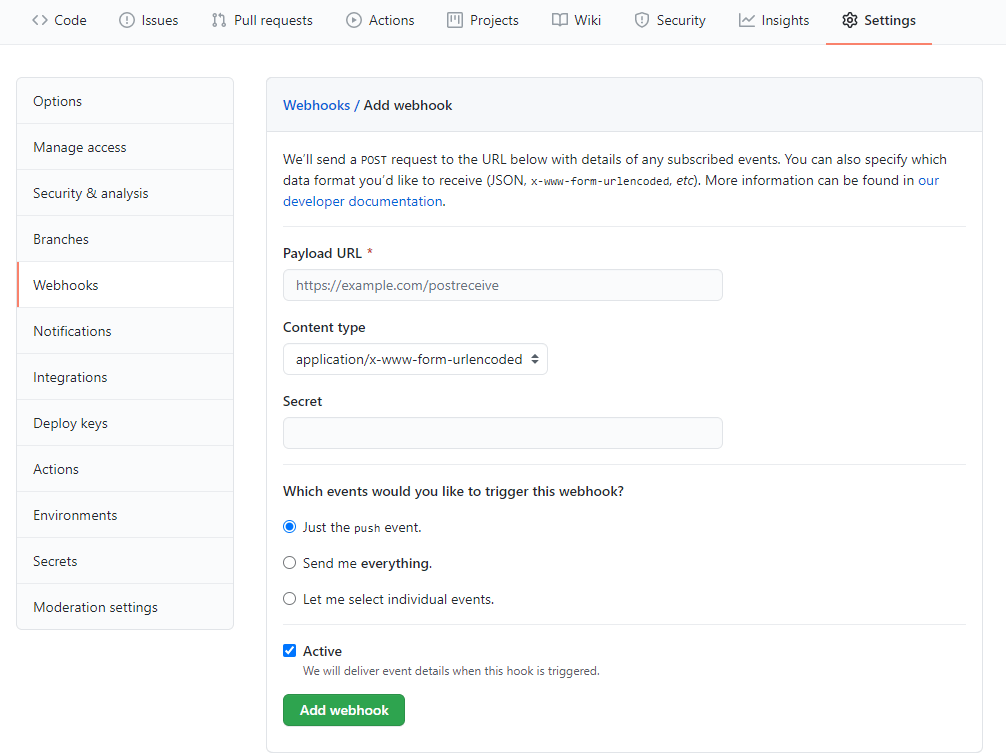
To get the value for the Payload URL field, we need to enter the url for the function we created earlier. At this point if you have not deployed your Azure Serverless Function application, you can do this to get the url or, in the next section, follow the steps to set up ngrok to enable testing the locally running functions application.
If you want to deploy to Azure you will find the url in the function app overview settings panel in the Azure portal. This is only the function base url so you will need to append the route of the function that was created. If you kept the default function name the entire Payload URL field value will look something like this:
https://functionapp1.azurewebsites.net/api/httptrigger1
After the Payload URL field, the next field is for the Content type of the request that we are expecting from GitHub, in this case our function is set up to accept:
application/json
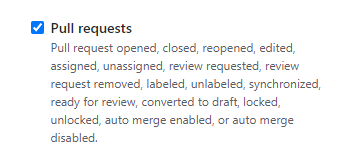
so make sure to update this setting. In the following field for the Webhook Secret provide the secret value that was saved as an application setting in the function app settings within the Azure portal. This will also be the same as the "secret" property value that was added to the "local.settings.json" file, shown earlier, within the functions project folder. Next we'll need to update the events that trigger the webhook so select the radio button for "Let me select individual events" then make sure to deselect the checkbox for "Pushes" and only select the checkbox for "Pull requests".
Then select Add webhook at the bottom and this will save the webhook configuration, and GitHub will automatically run a test request to make sure the webhook integration is working as expected.
If you don't want to deploy your Azure Severless Functions project to the Azure cloud while testing, you can use ngrok to test the GitHub webhook integration while running the function project locally. To do this download ngrok, and follow the installation instructions. Once it is setup, you can run the command ngrok http 7071 and ngrok will provide a publicly available url that will forward the port your functions app is running on. If you changed the default port for the functions project to something different than localhost:7071 make sure to run the ngrok command with the port you are using. With ngrok running you should get a url that looks like this:
http://92832de0.ngrok.io
With that url, go back to the GitHub webhook settings page in the repository settings and update the Payload URL field to match, ensuring that you have appended the entire url for the function so it would look like this:
http://92832de0.ngrok.io/api/httptrigger1
Then run your function app locally inside of Visual Studio Code, and save the webhook settings in GitHub. This will send another test request and you will be able to see the request, from GitHub's servers, being processed in the console output logs of your function app running locally.
Moving back to the "index.ts" file in your function project you can now add the code you need to integrate with the GitHub Webhook and it will use the @octokit/webhooks npm package to verify the incoming request was signed with the secret value you provided. Anytime an event occurs matching the webhook settings criteria, GitHub will send a POST request, and the webhook integration will occur automatically and securely. For an example of what can be done with GitHub webhooks, checkout out how to build a serverless comment system for a jamstack blog. Where you can find detailed instructions about how to setup a GitHub Webhook integration to provide a moderated commenting system for a blog without a database or servers.